Step-by-Step DIY Microcement Walls Tutorial
- johnkeogh28
- Jun 4
- 3 min read
If you want to transform your walls with a sleek, modern finish, microcement is an excellent choice. It’s durable, stylish, and perfect for both indoor and outdoor spaces. Plus, you don’t need to be a professional to apply it yourself. In this guide, I’ll walk you through a step-by-step DIY microcement wall tutorial that anyone can follow. Whether you’re a homeowner, a DIY enthusiast, or a professional applicator looking to expand your skills, this tutorial will help you achieve stunning results.
Getting Started with DIY Microcement Walls
Before you dive in, it’s important to understand what microcement is and why it’s so popular. Microcement is a cement-based coating that is applied in thin layers. It adheres well to many surfaces, including concrete, plaster, tiles, and drywall. The result is a seamless, waterproof, and highly durable finish that can be customised with different colours and textures.
Here’s what you’ll need to get started:
Microcement kit (base coat, top coat, and sealer)
Primer suitable for your wall surface
Sandpaper (various grits)
Trowels and spatulas
Mixing bucket and drill mixer
Protective gloves and mask
Painter’s tape and drop cloths
Tip: Always prepare your workspace by covering floors and furniture to avoid mess.

Preparing Your Walls for DIY Microcement Walls
Preparation is key to a successful microcement application. Start by cleaning your walls thoroughly. Remove any dust, grease, or loose paint. If your wall has cracks or holes, fill them with a suitable filler and sand smooth once dry.
Next, apply a primer to improve adhesion. The type of primer depends on your wall material:
For porous surfaces like plaster or drywall, use a penetrating primer.
For non-porous surfaces like tiles or concrete, use a bonding primer.
Allow the primer to dry completely before moving on. This step ensures your microcement will stick properly and last longer.
What goes under microcement?
Understanding the layers beneath your microcement finish is crucial. Typically, microcement is applied over a base layer that provides stability and adhesion. This base can be:
Concrete or cement screed: Ideal for new walls or floors.
Tile or existing ceramic surfaces: Must be cleaned and primed.
Plasterboard or drywall: Requires a primer and sometimes a reinforcing mesh to prevent cracking.
If your wall is uneven, you might want to apply a skim coat of cement or plaster to create a smooth surface. This will make the microcement application easier and more uniform.
For added durability, some professionals recommend embedding a fiberglass mesh between the base coat and the top coat. This helps prevent cracks and improves flexibility.
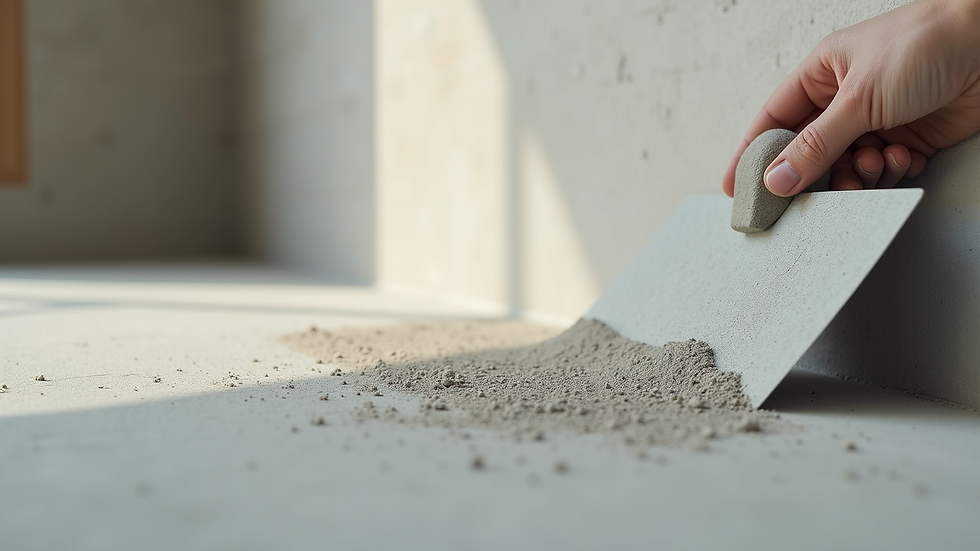
Applying Microcement: Step-by-Step
Now for the exciting part - applying the microcement! Follow these steps carefully:
Mix the base coat: Use a drill mixer to blend the microcement base coat until smooth. Avoid lumps.
Apply the first layer: Using a trowel, spread a thin, even layer of the base coat on your wall. Work in small sections to maintain control.
Let it dry: Allow the base coat to dry for 4-6 hours, depending on humidity and temperature.
Sand the surface: Use fine-grit sandpaper to smooth out any imperfections.
Apply the second base coat: Repeat the application and drying process for a second thin layer.
Apply the top coat: Mix the microcement top coat and apply it evenly with a clean trowel. This layer defines the final texture and colour.
Final sanding: Once dry, sand lightly to achieve your desired finish.
Seal the surface: Apply a protective sealer to waterproof and protect your microcement wall. Choose a matte or glossy finish depending on your preference.
Pro tip: Work in a well-ventilated area and wear protective gear to avoid inhaling dust or fumes.
Caring for Your Microcement Walls
Once your microcement wall is complete, maintaining it is simple. Clean the surface regularly with a damp cloth and mild detergent. Avoid abrasive cleaners or harsh chemicals that can damage the sealer.
If you notice any small cracks or chips over time, repair them promptly with a microcement patch kit. This will keep your walls looking fresh and extend their lifespan.
Microcement is also resistant to moisture, making it ideal for bathrooms, kitchens, and outdoor walls. Just ensure the sealer is reapplied every few years to maintain protection.
Ready to Transform Your Space?
With this diy microcement wall tutorial, you have everything you need to create beautiful, durable walls that stand out. The process might seem detailed, but with patience and the right materials, you’ll achieve professional results.
Remember, preparation and patience are your best friends in this project. Take your time with each step, and don’t rush the drying process. Soon, you’ll enjoy the sleek, modern look that only microcement can provide.
If you want to explore more about microcement products and solutions tailored for Ireland, check out Microcement.ie. They offer expert advice, quality materials, and training to help you master your next project.
Happy decorating!


Comments